


Introducing Spot UV embellishment
In need of opportunities to think creatively outside the box when designing for print? Perhaps adding Spot UV to your designs will open up a high-end new world for both you and your clients. And it’s even easier to design for and prepare for printing than you think.
‘So, what is Spot UV,’ you may well ask?
Sometimes termed ‘Spot Varnish’, ‘Spot Lamination’, ‘Spot Gloss’ or ‘UV Printing’, Spot UV is a tough clear coating of a polymer applied either over printed matter or on uncoated substrates. It is applied in liquid form, then exposed to ultraviolet (UV) light, which bonds and dries it instantly – hence one of its names, ‘UV varnish’. Spot UV refers to the application of a clear polymer coating to a specific area (or areas) of a printed piece to highlight it, rather than coating the entire surface of a printed item.
Used primarily as a striking design element, Spot UV is a creative way of adding depth and contrast to print items by adding varying levels of sheen and texture. It can be overlaid on inked surfaces, on unprinted stock or, for maximum effect, on a laminate of some kind. Blind Spot UV is a similar process to Spot UV, only the gloss polymer is added to non-image areas, creating gloss-only effects (eg a logo or text, or a pattern).
Usually, Spot UV is the final finishing touch in the printing process. This means that:
- all the ink layers are laid down;
- any paper lamination is added;
- the drying process completed;
- then the Spot UV is printed on top of the paper, as a clear gloss, and
- finally, dried to produce the finished result.
The Spot UV process differs fundamentally from standard UV coating, as indicated below
| Standard UV coating | Spot UV process |
| As the stock is fed through the printing press, rollers cover the paper or board with a UV coating. | The UV varnish is spread across a die-cut template, usually a thin film, which is placed over each sheet to ensure that only the required elements of the design are coated. |
| After application, the sheets are subjected to either infrared or ultraviolet light, which dries the coating instantly. | Once the varnish has UV dried, it provides a much hardier coating than other treatments are able to. |
What is Raised Spot UV?
Raised Spot UV is a form of embossing. Unlike standard Spot UV, though, it is a completely digital process. It therefore does away with expensive dies, set-up and make-ready. The raised effect – to a depth of some 20-50 microns – is created by layering up the polymer above a substrate using the digital printhead to create an embossed 3D effect.
The result is a tactile finish similar to that of braille: feel the Raised Spot UV as you run your fingers over it! This results in Raised Spot UV embellishment introducing a Wow! element to printed matter, especially to items that should project a top-end corporate image or a high-quality product.
What makes Spot UV so special?
In a nutshell, it is the ultimate in deluxe printing techniques! It provides a unique and exceptional way to introduce oneself and to make a lasting impression, thanks to the high clarity and eye-catching varnish that adds real contrast, depth and durability to a design. The thick UV varnish also lends a smooth, tactile quality to products, giving businesses the perfect means of promoting themselves and their products or services with something that no recipient will want to throw away! In fact, they are more likely to want to emulate it themselves. For example, almost half of well designed and expertly printed mail item can still be influencing recipients and driving purchases up to 28 days after delivery according to JICMail.
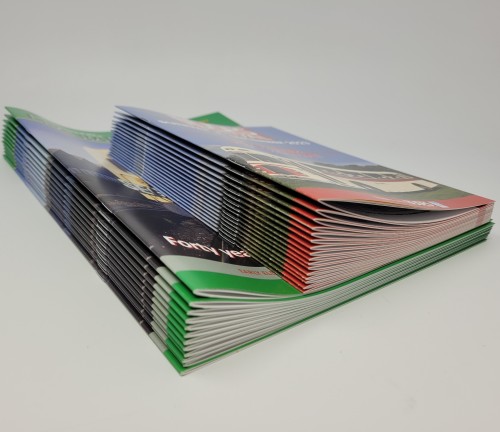
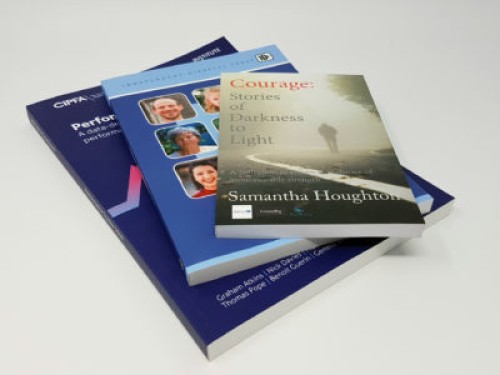
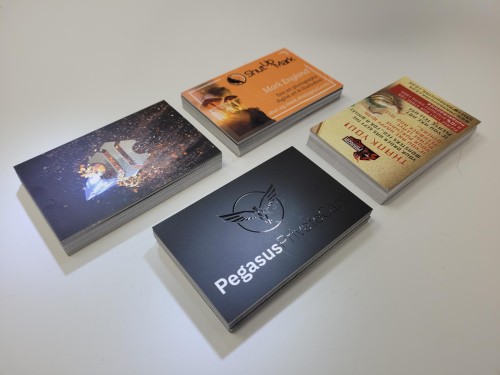
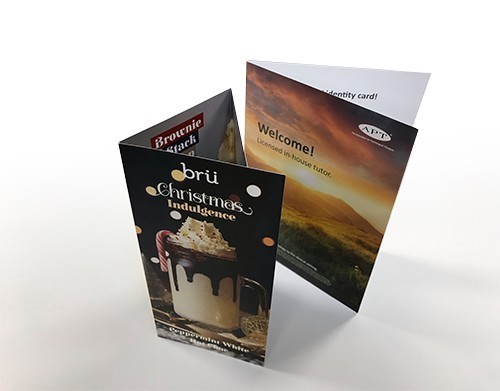
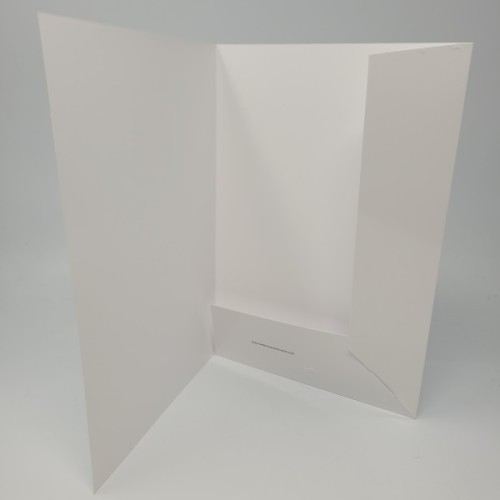
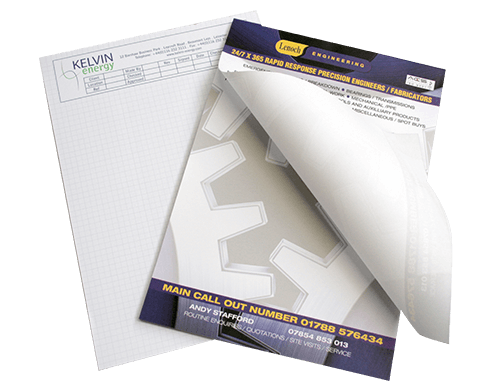
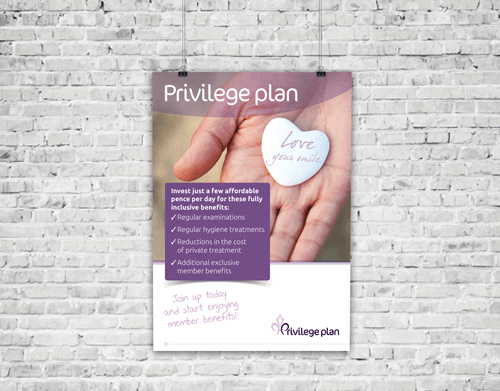
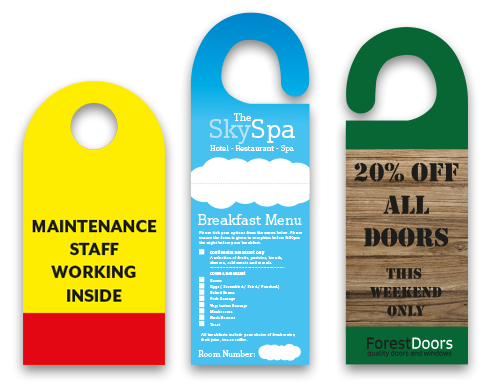
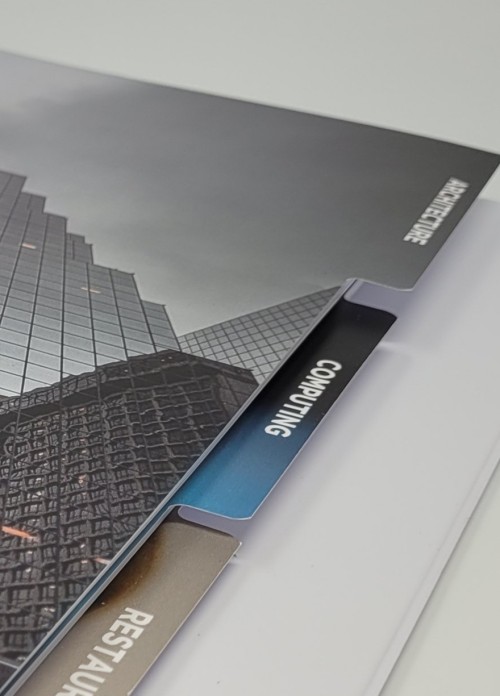
[images of bus card or brochure or presentation folder here, showing different uses of Spot UV]
All of this means that there is a lot more opportunity for designers and printers to help clients make a lasting impression with high-gloss Spot UV than simply making logos on business cards shiny to heighten their impact: presentation folders, brochures, flyers, posters, book covers, slip cases can now all be substantially enhanced by this embellishment.
Spot UV Common uses
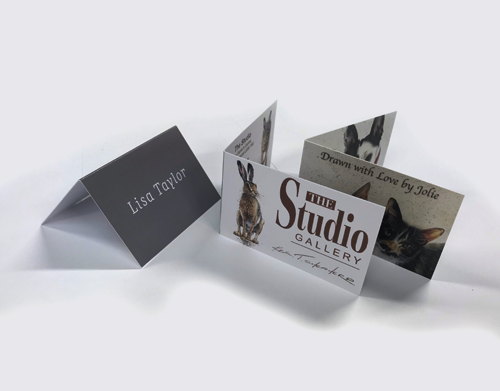
Whether standard or raised high-gloss Spot UV is applied, this is a popular choice for high-impact business cards, folders and book covers, where text, images, design patterns or even photos can be accentuated.
Spot UV Business Cards
Printed on a minimum of 350 gsm board, either with soft or matt lamination, business cards present many exciting design opportunities for making them impressive, memorable and durable and so help clients to make those important first impressions of their businesses and/or their products. Here, the minimal use of UV varnish for maximum effect is crucial, whether using Blind Spot UV or Spot UV over a colour to highlight logos, text, social media icons or product features or textures.
[examples of Blind Spot UV and Spot UV printing on business cards here]
Spot UV Flyers
Flyers are such a tangible form of marketing that the way they feel to the touch really influences how consumers perceive your brand. Adding Spot UV to your clients’ flyer designs adds an extra layer of interest and makes their promotion stand out.
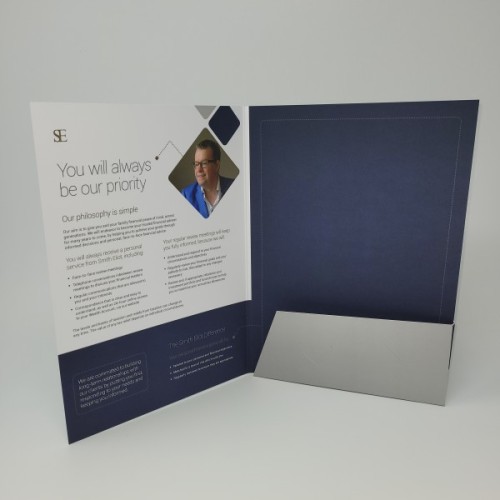
Spot UV Folders
Spot UV on a matt folder cover creates a luxury feel for your clients’ high-end brands. Spot UV on presentation folders is bound to impress conference delegates, clients at product presentations and recipients of their bundled marketing materials at events.
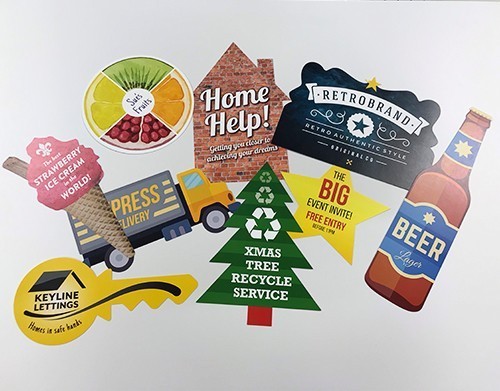
Other novel spot UV uses
Raised high-gloss Spot UV can also be used to simulate textures, so that embellished items look and feel completely realistic – and tactile. For example, the texture of chocolate, of metal, tiles or tyres, or of a football, is easy to replicate authentically – with breathtaking effects on both clients and other recipients of such printed items.
When to use high-gloss Spot UV (expert opinions)
| Insight | Source |
|
Flexpress |
|
Lighthouse |
|
Formax |
|
Euan Lockwood | CWS Digital |
|
Fran Collins | a dozen eggs |
4 Golden rules & 20
Design tips for Spot UV
We have drawn on our own extensive experience of providing raised spot UV printing capability, AND we have scoured the web to bring together a comprehensive list of tips when considering spot UV:
GR: Use Spot UV with appropriate laminates
- Add raised, high-gloss Spot UV to a matt or a soft-touch laminate. The high-gloss finish contrasts perfectly with both, creating the most striking effect.
- This pairing also ensures that the gloss Spot UV adheres more firmly to the substrate. Plus the gloss Spot UV requires a certain surface tension not provided by glossier laminations, which could cause the gloss to ‘sink’ into the substrate.
GR: Highlight specific elements to create the strongest impact
- For maximum effect, highlight only selected areas of your business card, postcard, presentation folder or other document. It’s the contrast between matt and raised gloss that creates the strongest impression and focuses the attention on important patterns, pictures or logos, or simply on a dramatic finish or texture that instantly demands attention.
- It’s the larger, more solid areas of typefaces and logos which tend to lead to the successful application of Spot UV: flat, square or rounded oval logos work very well. The bigger the area of UV, the more it will reflect and the more dramatic the impression it will make.
- As a general guide, to be most effective, Spot UV coverage should not exceed about 25% of the overall design. Sometimes less is more. Following this guideline, why not create a feature out of the absence of Spot UV on uncoated stock? So be sparing and consider making use of negative space: use Spot UV in non-image areas to highlight the uncoated image areas.
- Consider creating interesting textures, such as those of leather or beaten metal, by repeating patterns. They can be particularly impressive if contrasted with untextured areas on a business card or a presentation folder.
- Sometimes, Spot UV in monochrome can be really striking. For example, Spot UV highlighting images on a black or a red substrate obviates using a second colour. And what an impressive, tactile product it results in.
- Repeating brand names and logos to form patterns and applying Spot UV to them is a really simple way of creating an effective Spot UV design. This could be a symbol or logo associated with one’s brand or business.
- Consider using relevant images that will resonate with recipients of business cards: a Raised Spot UV an image of a feather or a pen (for a writer) or of an artist’s palette for a (gallery).
- Spot UV and Raised Spot UV can be applied to both sides of a business card to provide a sensationally tactile and memorable experience for recipients.
GR: Never use on uncoated or gloss substrates, near edges or folds, or on fine images
- Don’t use Spot UV on a gloss substrate: the effect of the UV will not be visible, let alone dramatic.
- Don’t use Spot UV on uncoated substrates – the porous nature of the paper will be sure to ruin your design as the UV varnish bleeds. Due to this limitations, leading spot UV printers such as Flexpress do not offer to print raised spot UV on uncoated stocks.
- Don’t use a Raised Spot UV on or near page edges, folds or creases in the base stock. This could cause the polymer to crack or peel off the substrate. In fact, follow the 1.5 to 3 mm rule: always ensure that any Spot UV areas are at least 1.5 to 3 mm from any page edge or fold to prevent cracking during the folding or cutting processes.
- Avoid very fine or thin images or small fonts with small enclosed gaps: the Spot UV is likely to fill these in. It cannot accommodate fine lines or hairlines or even small fonts: a risk is that a 1 mm shift during the printing or varnishing process could lead to serious misalignment.
- Avoid very thin stock: Spot UV does not perform well on a substrate that is thinner than about 175 gsm.
- Avoid too much Spot UV in a design: if you’re going that far, you might as well be using blanket varnishing or a gloss laminate. Remember, for maximum impact: less is more
GR: Consider using Spot UV or Raised Spot UV to enhance design elements
- Use Spot UV (or Blind Spot UV) as a standalone design element. Against a dark background, it is highly visible. This technique is useful for highlighting a section of a logo or creating a pattern that gives the item a textured feel. Even against a white background it’s possible to create a subtle gloss effect that exudes quality.
- Use Raised Spot UV or Spot UV to enhance design elements – over images or text, for instance.
- Overlay the raised, high-gloss Spot UV on top of a laminate for even stronger contrast and maximum effect.
- Black on black works! Yes, with high-gloss Spot UV or Blind Spot UV, you can make black images stand out prominently on a black (even uncoated or unprinted) substrate.
How to create and prepare a Spot UV file (for graphic designers)
Spot UV does require a little extra work in the design stages to make sure your artwork is set up correctly to achieve the Spot UV result that you desire, but the process is really straightforward. It simply means adding another dimension to cater for the separate UV varnishing process.
Essentially, you will provide your printer with two documents: one for the overall design and a second for the Spot UV only. This is how you should do it:
- Create your artwork as normal, saving it as a PDF.
- In the design package you use, create an extra layer and name it ‘Spot UV’. Next, select or create a very bright colour (eg orange, 100% magenta or black), and save it as ‘Spot UV’. Using a specific colour for all the Spot UV work is important as it enables the printer to pinpoint exactly where the varnish should be applied according to your exact specifications (especially the alignment of the print and UV elements).
- Go to the first layer(s) of your document and copy any elements that you want to have highlighted with a Spot UV finish.
- Next, paste these elements in exactly the same position on your new Spot UV layer. Colour all these elements with your saved Spot UV colour.
- Delete any elements in this document you don’t want to have treated Spot UV. It should now contain only the text and shapes you want to subject to Spot UV finishing.
- Save this document as ‘Spot UV’, exporting it as a PDF.
- You can then submit your PDF documents – the one for the printing and the other for the Spot UV finishing – for proofing.
Your proof will normally be returned to you comprising three pages (for single-sided printing): one will show the artwork layer, one only the Spot UV layer, and a third with both layers overlaid so that you can check that the Spot UV is correctly aligned with the original artwork.
Typically, you will be sent your proof with the Spot UV element either as a separate page or a separate file. The Spot UV element may be changed to a specific colour (e.g. Flexpress’s is 100% black), this is dictated by the printer’s spot UV printing equipment settings to help the printers recognise that colour as Spot UV.
How to choose the best Spot UV printing company for your design
When selecting a printing company to produce your Spot UV print design to your exact requirements, make sure that:
1. They do not batch print jobs
Large trade printers tend to batch their print jobs. For a more complex design – such as those involving Spot UV – it is essential that your design gets the attention it deserves from your print partner. So always choose a print company that does not batch print by default. Not only that, but deadlines tend to be stretched when batch printing, meaning that you have to wait a lot longer for your job.
2. They offer short print runs
Another key consideration is the minimum size of print order you will have to place. Some companies are competitive only for high-volume print orders (thousands of units or more).
So if you are testing out new Spot UV designs, you should consider finding a print company with competitive prices for small print runs (eg for 50 or 100 business cards or flyers; 50 or 100 booklets or folders). Check out our pricing (more below) and you’ll find that Flexpress is surprisingly competitive on short-run (and often long run also!) Spot UV print jobs.
But there’s another important consideration …
3. They will let you try before you buy
A lot can go wrong with Spot UV printing, and usually does without tried-and-tested methods and stringent process control. The only way you can truly determine if a trade print company can meet your expert graphic design requirements is to ask them to demonstrate the quality of their Spot UV print products.
You might find it’s trickier than you think to get a company to provide you with a free bespoke Spot UV sample … this is normally because many printers will not touch small jobs except in batches and for larger orders.
Thanks to Flexpress’s leading-edge printing technology, we are able to offer you a free single-sided Spot UV test sheet, printed to your exact specification. This means that you can test your own design physically free of charge rather than relying solely on a free sample pack (which we can also offer).
Get your spot UV print design produced by Flexpress for free
Spot UV printed product prices
If you are printing a bespoke order, then the cost of Spot UV depends on its size as a percentage of the overall job. So, for example, a small logo with the Spot UV or Raised Spot UV added to it may amount to only 10–15% of the overall design and this coverage would help the print supplier to estimate the cost of the embellishment.
We have gathered some sample costs from a range of different companies to help you understand the kind of cost that Spot UV or Raised Spot UV detailing may add to your project. We have selected business cards and presentation folders to demonstrate the costs using products which are popular choices for Spot UV. Alongside the price with/without Spot UV we have detailed the specification provided by the print company in question – including whether they use standard or Raised Spot UV and whether they gang print jobs or print them individually.
| Base business card specification | ||||||
|---|---|---|---|---|---|---|
|
Size/dimensions |
Standard: 85 mm x 55 mm |
|||||
|
Stock |
400 gsm |
|||||
|
Corner detail |
Square corners |
|||||
|
Lamination |
Soft Touch lamination, both sides (if available) |
|||||
|
Printed sides |
Double-sided print |
|||||
|
Spot UV sides |
Spot UV both sides |
|||||
|
Quantity |
200 business cards |
|||||
|
Qty |
Price without Spot UV |
Price with Spot UV |
Difference (£) |
Difference (%) |
UV Type/ Ganging1 |
Company |
|
200 |
£64.99 (£0.32/card) |
£99.98 (£0.49/card) |
£34.99 (£0.17/card) |
53% |
Standard/ Batch |
Moo.com2 |
|
250 |
£25.70 (£0.12/card) |
£36.80 (£0.18/card) |
£11.10 (£0.04/card) |
43% |
Standard/ Batch |
Solopress3 |
|
250 |
£28.14 (£0.11/card) |
£40.14 (£0.16/card) |
£12.00 (£0.05/card) |
42% |
Standard/ Batch |
HelloPrint |
|
200 |
£29.57 (£0.14/card) |
£46.63 (£0.23/card) |
£17.06 (£0.09/card) |
57% |
Premium Raised/ Individual |
Flexpress4 |
|
Average difference in price to include Spot UV in business card design |
Spot UV cost per business card: £0.09 |
|||||
|
Percentage per project: 49% |
||||||
|
Methodology/notes: Prices are quoted including VAT. Prices were last updated in January 2020. 1 This refers to the printer’s approach to producing your job. Batching means printing many different designs on the same sheet of material – leading to reduced customisability and frequently less individual care. 2 Moo do not offer this industry standard size, offering 84 mm x 55 mm instead. 3 Solopress did not offer a Soft Touch lamination + Spot UV business card at the time of writing. 4 Of the companies included, only Flexpress used Raised Spot UV as standard. Others offer standard Spot UV of less than 10 microns. |
||||||
| Base presentation folder specification | ||||||
|---|---|---|---|---|---|---|
|
Size/dimensions |
Oversize A4 (305 x 215 mm) – 5 mm capacity |
|||||
|
Stock |
350 gsm silk finish |
|||||
|
Colour |
Full colour both sides |
|||||
|
Printed Sides |
Double-sided print |
|||||
|
Lamination |
Matt lamination both sides |
|||||
|
Spot UV sides |
25% Spot UV coverage, external sides |
|||||
|
Folder Bonding |
Glued or interlocking (glue preferred) |
|||||
|
Assembly |
Full assembly by printer |
|||||
|
Quantity |
250 presentation folders |
|||||
|
Qty |
Price without Spot UV |
Price with Spot UV |
Difference (£) |
Difference (%) |
UV Type/ Ganging1 |
Company |
|
250 |
£496.80 (£1.98/folder) |
£789.60 (£3.16/folder) |
£292.80(£1.18/folder) |
59% |
Standard/ Batch |
JamJarPrint2 |
|
250 |
£1008.90 (£4.04/folder) |
Unavailable |
n/a |
n/a |
Standard/ Batch |
SoloPress3 |
|
250 |
£357.29 (£1.43/folder) |
£629.44 (£2.52/folder) |
£272.15 (£1.09/folder) |
76% |
Standard/ Batch |
AuraPrint |
|
250 |
£287.43 (£1.15/folder) |
£437.41 (£1.75/folder) |
£149.98 (£0.59/folder) |
52% |
Standard/ Batch |
RouteOne4 |
|
250 |
£331.82 (£1.32/folder) |
£434.06 (£1.73/folder) |
£102.24 (£0.42/folder) |
31% |
Premium Raised/ Individual |
Flexpress 5 |
|
Average difference in price to include Spot UV in presentation folder design |
Spot UV cost per presentation folder: £0.82 |
|||||
|
Percentage per project: 54.5% |
||||||
|
Methodology/notes: Prices are quoted including VAT. Prices were last updated in January 2020. 1 This refers to the printer’s approach to producing your job. Batching means printing many different designs on the same sheet of material – leading to reduced customisability and frequently less individual care. 2 JamJarPrint offered only interlocking (not glued) folders. 3 SoloPress did not offer Spot UV finishing to presentation folders at time of writing. Left for useful price comparison on matt laminated presentation folders. 4 Route1 did not offer price for 250 qty, so a prorated price was calculated based on 200 quantity 5 Of the companies included, only Flexpress used Raised Spot UV as standard. Others offer standard Spot UV of less than 10 microns. |
||||||
Spot UV FAQs
Is Spot UV the same as Spot Gloss?
Yes, Spot UV and Spot Gloss are common terms for the print finishing technique of applying a high-gloss UV coating to a specific area on a printed substrate.
How thick is Spot UV?
A standard Spot UV varnish is only a couple of microns thick, and is therefore virtually indistinguishable by its thickness (although its sheen does provide a unique texture that makes it perceivable). The thickness of Raised Spot UV is a very different matter though!
How thick is Raised Spot UV?
The recommended maximum thickness of Raised Spot UV 80 microns (20-80 microns is the usual range). This is almost as thick as braille, and it enables designers to build a significant degree of tactility into a design.
The thin layer of glossy polymer also creates a slightly raised texture, which is why Raised Spot UV works best when used with a matt lamination or dot touch finish. This combination maximises on the contrast between the level matt substrate and the slightly raised glossy textures. For smaller areas, or fine text, we would not recommend more than 20 microns in thickness.
Should you include bleed in a Spot UV design?
Yes and no. Yes, if the Spot UV is something like a gloss pattern that runs to the trim edges of the substrate. No, if the Spot UV is limited to, say, a logo or an image that is contained within the trim edges of an item.
Is Raised Spot UV the same as raised print?
Definitely not, even though the effect appears similar. For one thing, the processes involved use completely different technologies. Raised ink is achieved through a traditional printing process known as thermography. This specialised process combines offset printing ink with a powdered resin, which is baked so that the resin rises to give the ink a slightly raised, textured effect. The heat then applied melts the resin to form a raised, glassy and slightly enlarged image.Raised ink itself is clear and sits on top of the designated printed area.
Like Spot UV, raised ink does not affect the reverse side of a substrate (unlike embossing, which affects both sides). Raised ink is great for adding texture, gloss or interest to a business card, for example, but not in the same way as Raised Spot UV, a digital process in which a thick UV varnish is applied to a substrate.
Is raised foiling the same as raised Spot UV?
No. Gold foiling is an entirely different technology to Spot UV, but Raised Spot UV has been used to brilliant effect in conjunction with both gold and silver foiling.
Can you use Spot UV with gold/silver foiling?
Yes, this is possible, but not all printers can offer all the combinations of these embellishments. At Flexpress we offer Raised Spot UV, raised gold/silver foiling, and also traditional hot foiling. These can be used either individually or even together to create a wonderfully embellished effect on your print.
Which laminates are compatible with Spot UV?
Here’s a handy table to help you know which laminates may be used effectively with Spot UV.
|
Laminate type |
Compatible with Spot UV? |
|
Silk |
Yes |
|
Matt |
Yes |
|
Soft touch |
Yes |
|
Gloss |
No |
|
Anti-scuff matt |
Yes |
What is the minimum substrate thickness to use Spot UV on?
The table below outlines the different stock thicknesses, and their potential compatibility with spot UV.
|
Stock type |
Weight (gsm) |
Thickness (microns) |
Typical use |
Compatibility with spot UV? |
|---|---|---|---|---|
|
Paper |
80 gsm |
Copier/printer paper |
Disastrous |
|
|
Paper |
90 gsm |
Newspaper |
Disastrous |
|
|
Paper |
100 gsm |
Letterhead / business stationery |
Not Recommended |
|
|
Paper |
120 gsm |
Letterhead / business stationery / lightweight flyers / leaflets |
Not Recommended |
|
|
Paper |
130 gsm |
Flyers / leaflets |
Not Recommended |
|
|
Paper |
150 gsm |
Book inners / flyers / leaflets |
Not Recommended |
|
|
Paper |
170 gsm |
Premium book inners / Premium flyers / leaflets |
Not Recommended |
|
|
Generally, anything 200 gsm or above is considered card. |
||||
|
Card |
200 gsm |
150-220 micron |
Booklet pages / service sheets |
Yes |
|
Card |
250 gsm |
190-285 micron |
Concertina brochures / booklet covers and pages |
Yes |
|
Card |
300 gsm |
237-342 micron |
Booklet and book covers / tent cards / postcards / luxury flyers |
Yes |
|
Card |
350 gsm |
284-395 micron |
Premium booklet / premium book covers / tent cards / postcards |
Yes |
|
Card |
400 gsm |
315-460 micron |
Business cards |
Yes |
|
Card |
600 gsm |
> 690+ micron |
Business cards |
Yes |
Can spot UV varnish crack?
Yes, it can. So do your best to avoid placing Spot UV over areas of your design that need to be creased and/or folded. This is even more important for Raised Spot UV, because it is so tactile: putting a crease or fold through it may cause the Spot UV to crack. When you create your artwork, we recommend terminating the Spot UV just before the edge of the fold or crease. This way, the printer can ensure that the Spot UV cannot be damaged through creasing or folding.
What are the common pitfalls to spot UV designs?
Attempting tiny detailing: Does your artwork contain small or thin type, fine lines or minute areas that could fill in (such as the inside of an “e” or an “o”)? While good printing machines are very accurate, we don’t recommend putting Spot UV on these elements. For one thing, the smallest amount of movement during application may cause mis-register. Also, having such a tiny amount of Spot UV on small elements isn’t the best way to get your print noticed! To make the best use of Spot UV, apply it to elements such as large blocks of colour or photographs.
Overuse of spot UV: Spot UV tends to work best when it’s fairly subtle. The saying “you can have too much of a good thing” applies here. Highlight only important elements or anything you want to draw particular attention to with Spot UV, not an entire surface.
Can you print on top of Spot UV coated areas?
No you can’t. This is because the ink requires a porous substrate to adhere to, and it will not bind to the non-porous dry Spot UV coating.
How much does Spot UV cost? Is Spot UV printing expensive?
See our price comparison tables above for examples of how adding Spot UV changes the cost of a print job. In some cases it added 30-50% onto the print job. Obviously the price increase isn’t just because spot UV is nice and it’s not just the cost of the ink – there is more labour and time added to each job, such as additional proofing complexity, drying time and additional print runs once the base substrate has dried.
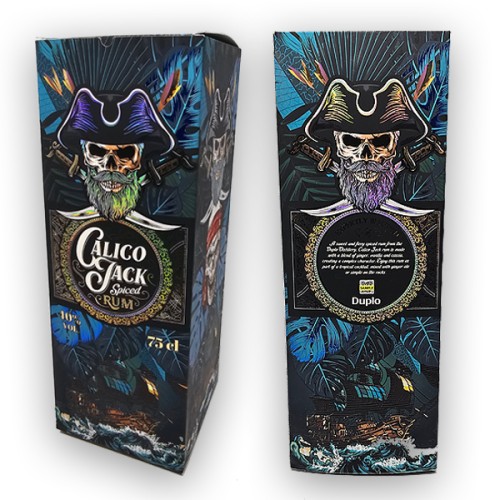
Which Spot UV printing machine does Flexpress use?
To achieve the industry leading quality we’re known for, we use the Duplo DuSense Sensory Coater. Its 600 dpi printhead offers exceptional quality and Automatic Camera Correction, which allows for spot-on registration. The Duplo DuSense can take a maximum sheet size of 364 mm x 740 mm and it can run at speeds of up to 1080 sheets per hour.
When should a print coating be used?
Coatings usually help to protect and enhance a final printed product. They are a must for any piece that is likely to be handled: business cards, bookmarks, catalogues or presentation folders. Four main coatings are available: Soft Touch, varnish, UV coating and aqueous. Your printer will help you decide which type is best for your printed matter.
Soft Touch Coating
This coating creates a velvety texture that exudes elegance and gives paper its “softness” to the touch, increasing its tactile appeal. It creates a softer look and feel on printed materials than either aqueous or UV coating (see below), at the same time producing a fingerprint-resistant barrier. It dries fast and is non-yellowing – an important characteristic of promotional materials.
Varnish
Varnish is basically clear ink that can be gloss, satin or matte. A flood varnish covers the entire printed page for protection or sheen. A spot varnish allows you to highlight specific areas of a printed piece and adds shine and depth to specific elements on a page. Varnishes can also be applied on a printing press.
UV Coating
UV coatings are cured by exposure to ultraviolet light to dry and harden them quickly. They provide the highest gloss finish as opposed to other coatings but they may crack when scored or folded due to the thickness and hardness of the coating. UV coating makes photographs jump out of the page.
UV coatings can be applied as a flood (covering the entire printed sheet) or as a spot coating and can be applied on or off press. Spot UV coating can be a great way to draw the reader’s eye first to your logo or your product. UV compatible inks must be used on sheets that will be UV coated. UV coated sheets cannot be foil stamped and embossing should be done only after the coating.
Aqueous Coating
Aqueous coating is a clear, fast-drying water-based coating that is used to protect printed pieces. It provides a high-gloss or matte surface that deters dirt and fingerprints. Aqueous coating improves the durability of mailed postcards and other printed pieces and protects business cards against handling. It also looks beautiful on brochures and presentation folders.
What is the difference between varnish and aqueous coating?
Like varnishes, aqueous coatings are applied in-line on press, usually by the last unit on a printing press. But they are shinier and smoother than varnish, have a higher resistance to abrasion and rub, are less likely to yellow and are more environmentally friendly.
Aqueous coatings provide more substantial scuff-resistance than varnishes. Aqueous is typically applied to the entire printed piece. Owing to its water base, aqueous coating is more environmentally friendly than varnish or UV coatings.and fingerprints.
Need help with your spot UV project? If you can design it, we can print it. Want to test out an idea – why not request your free spot UV custom test sheet here.